Getting Started
Follow these steps to begin developing your projects with SensEdu.
If you prefer video tutorials, we have an installation guide on YouTube (not yet).
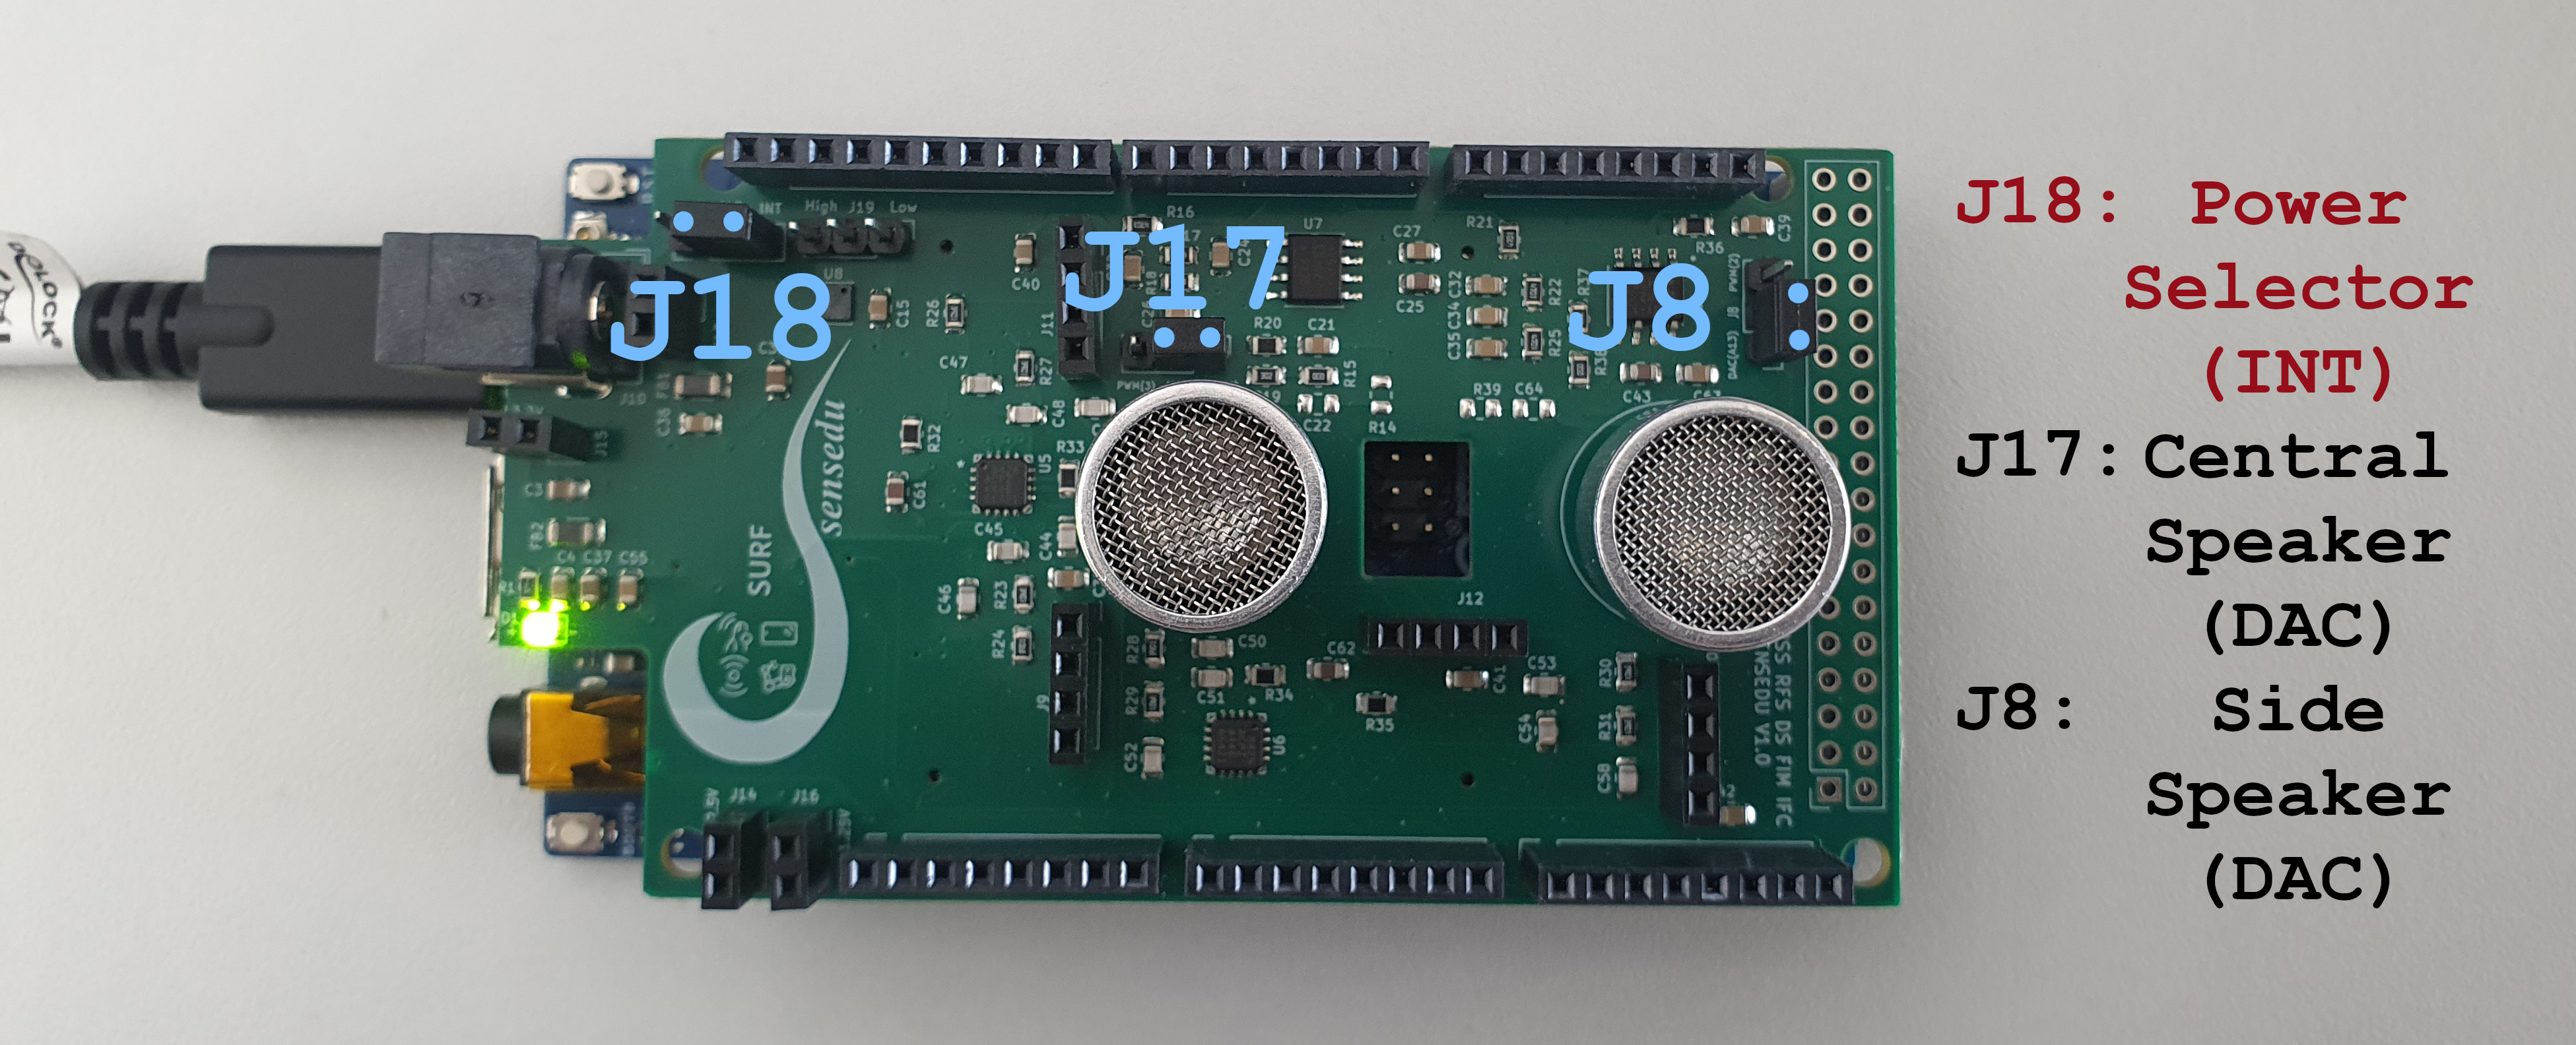
Step 1 : Connect SensEdu Shield to the Arduino GIGA R1. By default, the power and speakers are disabled. To enable them, place a small 2-pin jumper onto headers J18, J17, and J8, according to the desired settings. The standard configuration is shown in the figure below (more details in PCB section)
Step 2 : Download and Install Arduino IDE
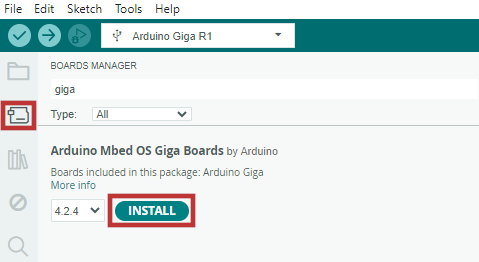
Step 3 : Open the Boards Manager tab, search for giga and install the latest version of Arduino Mbed OS Giga Boards package
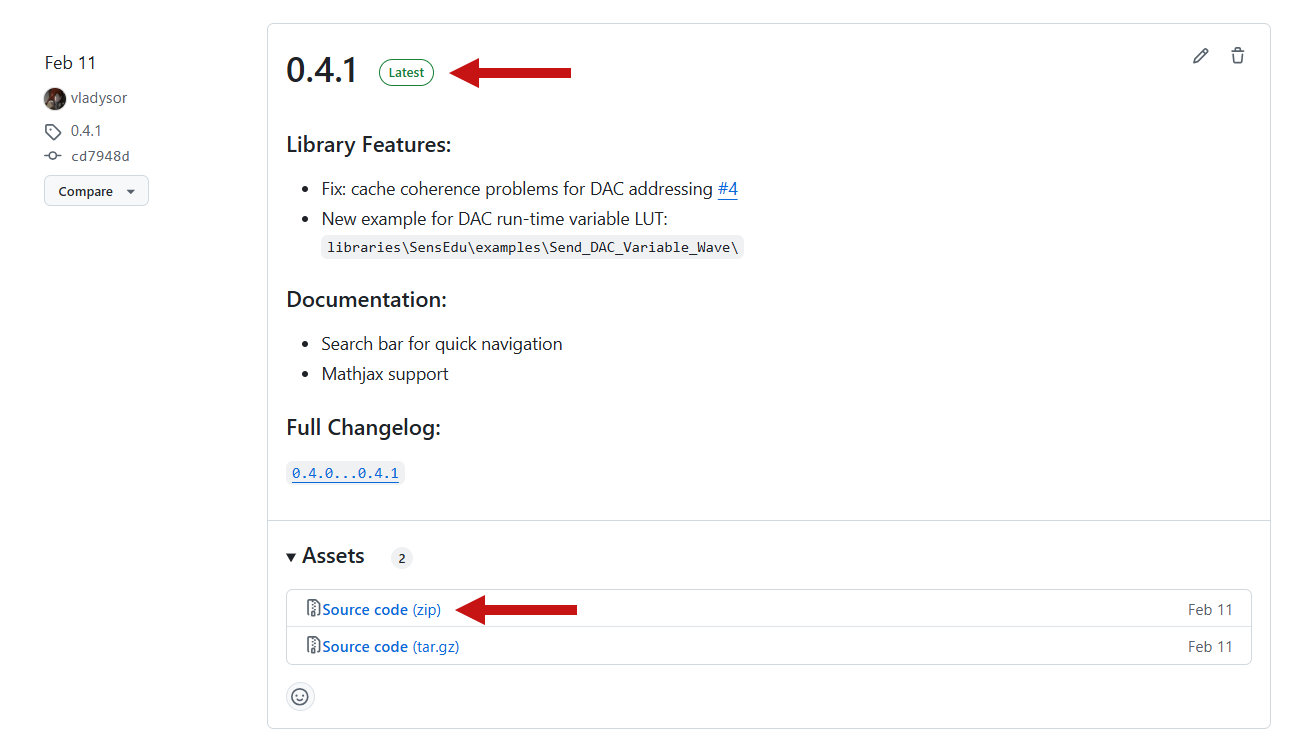
Step 4 : Download the latest SensEdu release
Step 5 : Unzip downloaded files to a preferred location on your system
Step 6 : Move extracted contents of library folder to the Arduino folder My Documents\Arduino\libraries\
Step 7 : Navigate to File → Examples → SensEdu and select Blink_Delay example
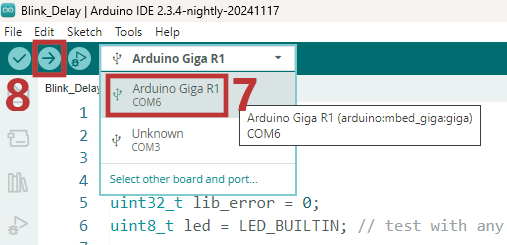
Step 8 : Select Arduino Giga R1 board and corresponding COM port
Step 9 : Click Upload to compile and upload the sketch to your board. If the built-in LED starts blinking, the setup was successful!
Post-Setup
Now that your setup is complete, you can start developing your projects with SensEdu! Here are some next steps to get started:
- Explore the Library wiki section for detailed examples of each peripheral
- Check out sample projects in
projects\folder, and respective Projects section - For troubleshooting or guidance, visit the Help section
If you are interested in contributing to SensEdu, visit the Contributing page and join our community!